第一章Activity的生命周期和启动模式
Activity生命周期
单个Activity
启动Activity
onCreat->onStart->onResume
Activity切换到桌面(Activity用了透明主题不会回调onStop)
onPause->onStop
返回Activity
onRestart->onStart->onResume
按Back键回退
onPause->onStop->onDestroy
直接强制停止应用
没有回调
两个Activity
Activity之间的切换
(A1切换A2)
A1 onPause
A2 onCreat->onStart->onResume
A1 onStop
(A2按Back键回退A1)
A2 onPause
A1 onRestart->onStart->onResume
A2 onStop->onDestroy
Activity启动模式
standard(标准模式)
每个Activity都在同一个栈
每次启动一个Activity都新建实例
singleTop
每个Activity都在同一个栈
除了启动本来就在栈顶的Activity不会新建实例
启动不在栈顶的Activity都新建实例
singleTask
每个Activity都在同一个栈
要启动的Activity在栈内的不会重复新建实例
每次切换非栈顶的Activity会把在它后入栈Activity清除
singleInstance
每个Activity独立一个栈
要启动的Activity在栈内的不会重复新建实例
每次切换Activity切换栈
Activity启动方式
显式 Intent
|
|
隐式 Intent
隐式 Intent不明确指定启动哪个Activity,而是设置Action、Data、Category,让系统来筛选出合适的Activity。筛选是根据所有的< intent-filter >来筛选,可以使用隐式 Intent从A应用启动B应用。
设置Action
android:label是设置标签用来区分同一个应用不同activity用同一个action的情况。
启动
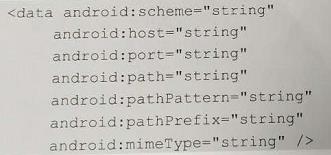
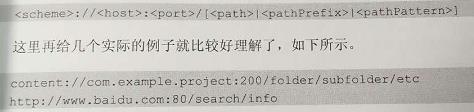
设置Data
|
|
启动
也可以浏览器直接访问”app://“启动
其它语法(懒得打)
设置Category
|
|
启动
第二章IPC机制(进程间通信机制)
多进程
详细内容https://www.cnblogs.com/mythou/p/3258715.html
在Android使用多进程只有一种方法,就是给四大组件的AndroidManifest指定android:process
android:process有两种,一种是类似”:remote”,另外一种是类似”xxx.xxx.remote”的,前者是属于当前应用的私有进程,其它应用组件不可以和它跑在同一个进程中,后者则是全局进程,可以通过ShareUID跑在同一个进程中。
多进程带来的问题就是共享数据的问题,因为每个进程都分配不同的虚拟机加载,相当于启动新的应用。
启动服务和绑定服务
此部分出处为:http://www.jianshu.com/p/2fb6eb14fdec
作者:食梦兽
个人略微修改
启动服务(startService)
使用Service的步骤:
1.定义一个类继承Service
2.在Manifest.xml文件中配置该Service
3.使用Context的startService(Intent)方法启动该Service
4.不再使用时,调用stopService(Intent)方法停止该服务
使用这种start方式启动的Service的生命周期如下:
onCreate()—>onStartCommand()(onStart()方法已过时) —> onDestory()
说明:如果服务已经开启,不会重复的执行onCreate(), 而是会调用onStart()和onStartCommand()。
服务停止的时候调用 onDestory()。服务只会被停止一次。
特点:一旦服务开启跟调用者(开启者)就没有任何关系了。
开启者退出了,开启者挂了,服务还在后台长期的运行。
开启者不能调用服务里面的方法。
绑定服务(bindService)
使用Service的步骤:
1.定义一个类继承Service
2.在Manifest.xml文件中配置该Service
3.使用Context的bindService(Intent, ServiceConnection, int)方法启动该Service
4.不再使用时,调用unbindService(ServiceConnection)方法停止该服务
使用这种bind方式启动的Service的生命周期如下:
onCreate() —>onBind()—>onunbind()—>onDestory()
注意:绑定服务不会调用onstart()或者onstartcommand()方法
特点:bind的方式开启服务,绑定服务,调用者挂了,服务也会跟着挂掉。
绑定者可以调用服务里面的方法。
对象序列化和反序列化
知识背景:
将对象转换为字节流保存起来,并在以后还原这个对象,这种机制叫做对象序列化。
• 当一个对象被序列化时,只保存对象的非静态成员变量,不能保存任何的成员方法和静态的成员 变量。
• 如果一个对象的成员变量是一个对象,那么这个 对象的数据成员也会被保存。
• 如果一个可序列化的对象包含对某个不可序列化 的对象的引用,那么整个序列化操作将会失败,并且会抛出一个NotSerializableException。我 们可以将这个引用标记为transient,那么对象仍然可以序列化。
选择序列化方法的原则:
•在使用内存的时候,Parcelable比Serializable性能高,所以推荐使用Parcelable。
•Serializable在序列化的时候会产生大量的临时变量,从而引起频繁的GC。
•Parcelable不能使用在要将数据存储在磁盘上的情况,因为Parcelable不能很好的保证数据的持续性在外界有变化的情况下。尽管Serializable效率低点,但此时还是建议使用Serializable 。
使用Serializable
例子,serialVersionUID是用来检验反序列化的类是否发生变化的。
Serializable是一个空接口主要用来标记。
输出结果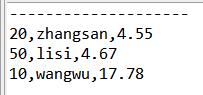
使用Parcelable
|
|
发送
接收
Binder

使用Messenger
总的来说Messenger负责发送信息,message负责装载信息, Bundle负责保存信息。服务端发自己Messenger给客户端,客户端又发自己的Messenger给服务端,利用对方给的Messenger发信息给对方。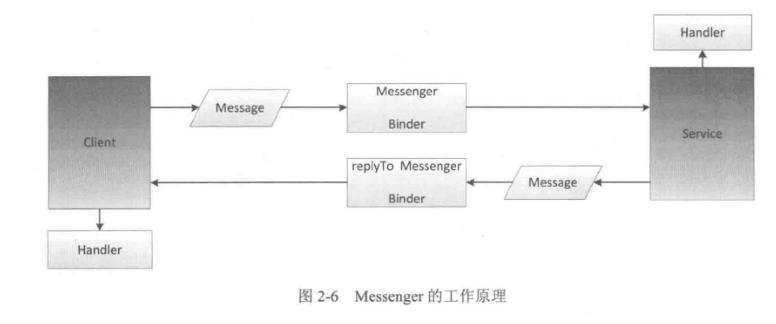
服务端
新建一个服务,然后参考以下代码
客户端
|
|
使用AIDL
首先 在客户端服务端都新建一个aidl文件夹,两边放的有关aidl的文件都要同包名,新建aidl文件当接口,自带可传以下类型数据。
如果要传输对象则需要实现Parcelable接口的同时,要定义一个同名的aidl引用它,如
Book.java
Book.aidl
定义接口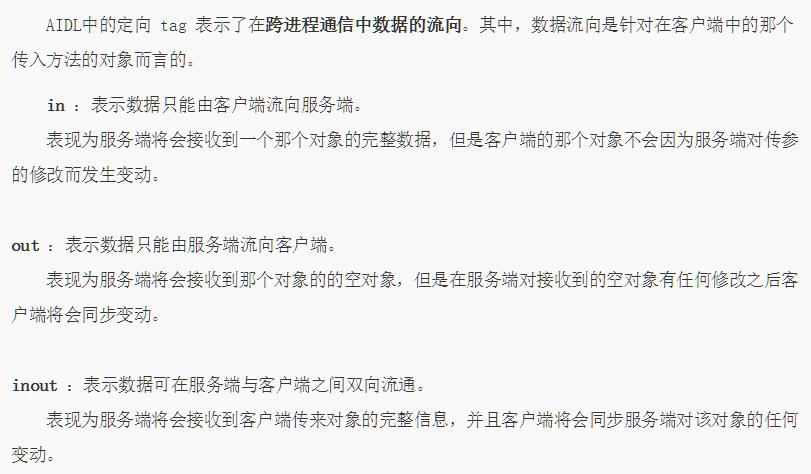
IOnNewBookArrivedListener.aidl
IBookManager.aidl
服务端
也是首先新建一个服务
客户端
|
|